

How to add an Image Resource
This help sheet explains adding an image onto your learning site
Add an Image
1. To add the coursework/homework feature you must first be in edit mode. Click the Edit Page button on the page that you want to work on.

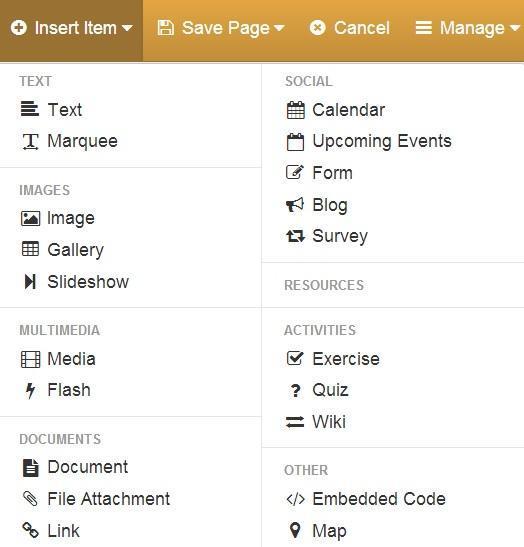
2. Then click on Insert Item button and then select the Image option.
3. Next, decide where you want to place the text by clicking on one of the boxes that says Insert image here.

4. You will be presented with Create Image - Image Details window. You can click on the Resources item in the vertical menu on the left hand side of the screen to choose an existing image resource. Click on the blue text Choose on the row of the resource you want to use.
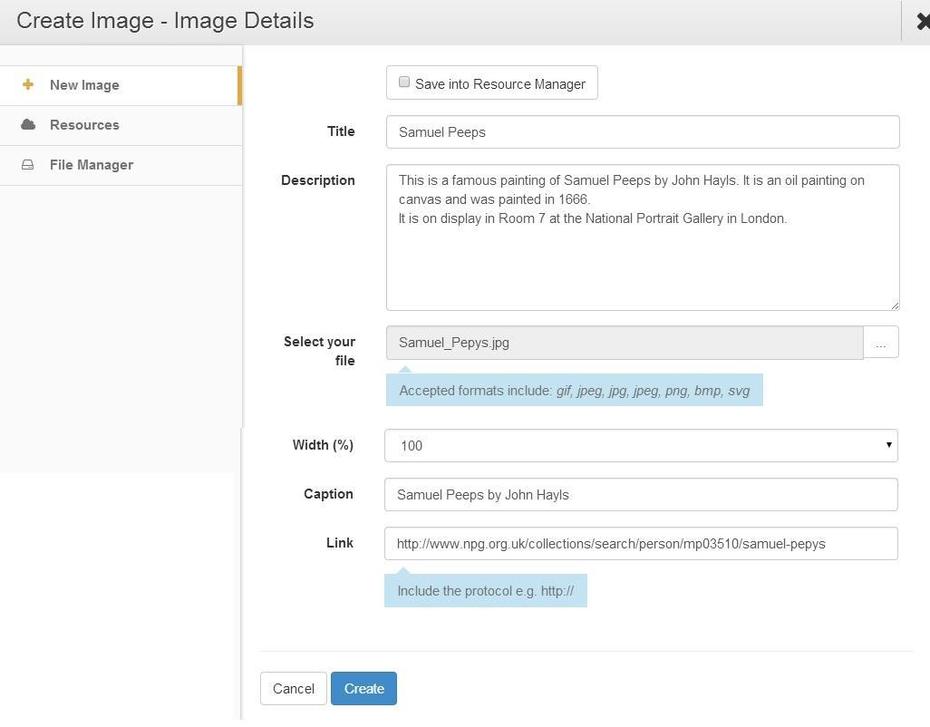
5. If you are creating the image resource enter the information you want your pupils to see, giving as much information as you can about the image. Once you are happy with your image information click on the blue Create button at the bottom of the window. If this is an image you may use again or would like to share with others, place a tick in the Save into Resources Manager box.

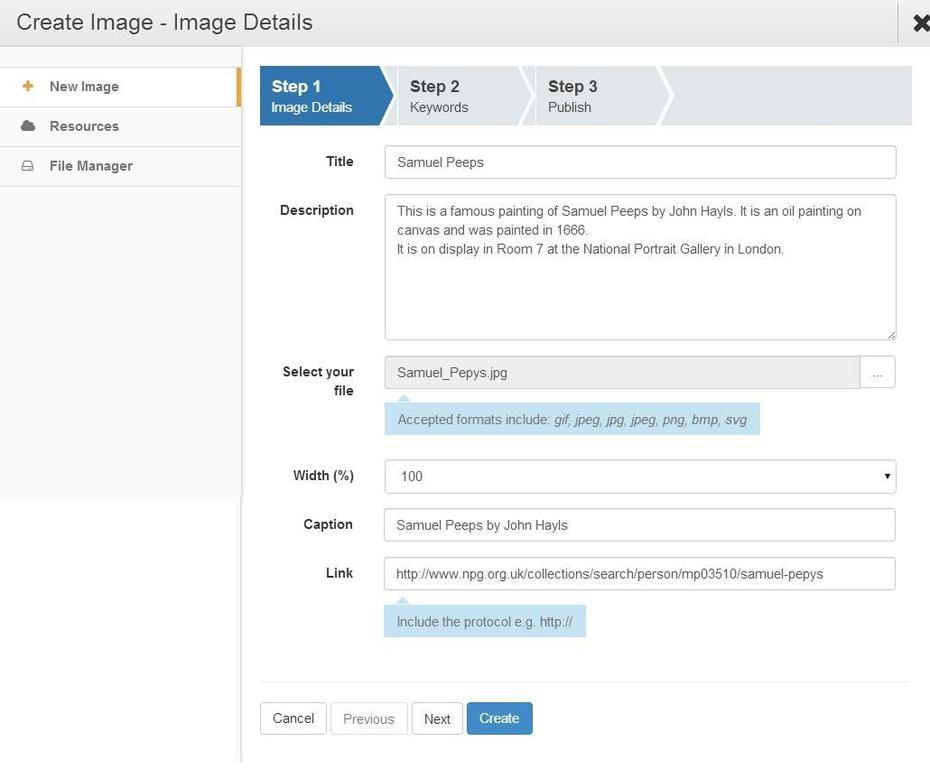
6. If you click Save into Resources then be presented with the Create a Resource window for an image, work through the three windows. The information you have already entered on the previous screen will appear here. Click on the Next button to move to Step 2.
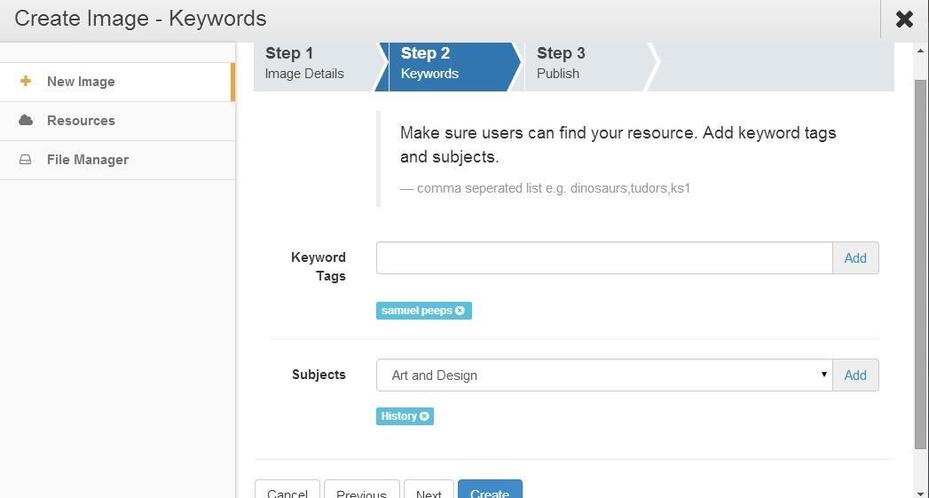
7. Work through Step 2 adding the correct information. Keyword tags allow you to search for resources quickly and easily. You should enter obvious tags to aid other teachers, as well as yourself, when searching for resources at a future time and click on the Add button on the right of the field. The resource can be assigned to one or more subject. Select the subject from the drop down menu and click on the Add button on the right of the field. Click on the Next button.
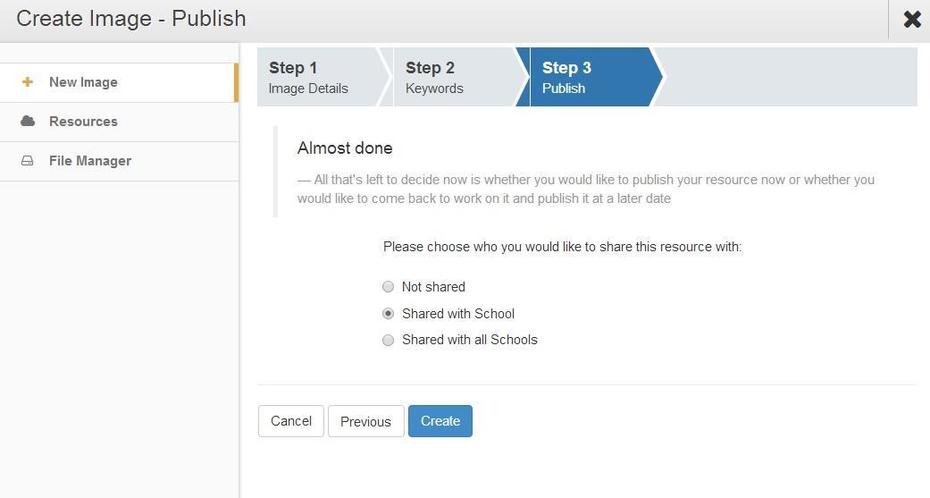
8. Work through Step 3. If you publish the resource it will be available to add to a learning site. You can also share this resource with others in your school or all schools that use Learn. You can also allow others to make a copy of this resource and amend it slightly for their own use, allowing for differentiation. Click on the blue Create button to save your new resource.
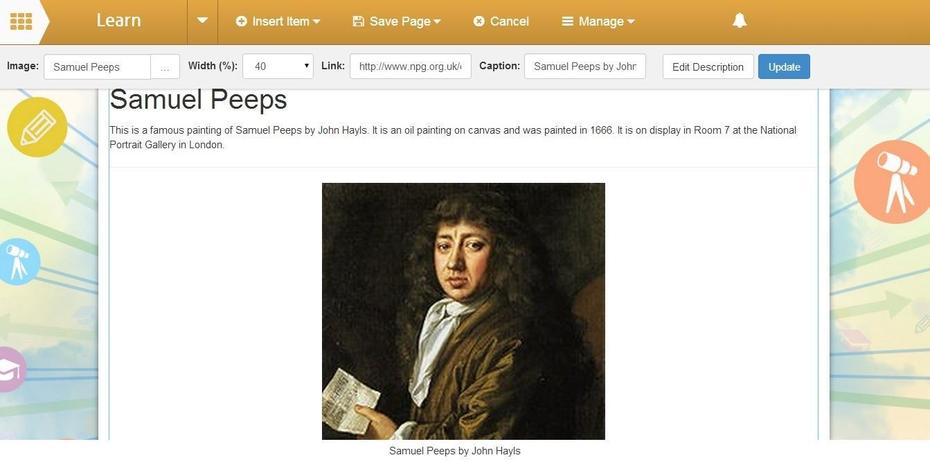
9. You will now see your resource on your learning site. As a link was added to the resource when the mouse cursor is placed over the image the will appear to indicated it is a hyperlink.
10. Click on the Save button and then select Save and Publish Page.
