

A Pupil’s Guide to
using your Learning Sites

|
Our Learn URL |
|
|
Your Username |
|
|
Your Password |
|
It is very important that you do not share your password with anyone other than your parents. Please remember our e-safety rules in school.
Your Dashboard

Your learning platform can be made up of different apps. The apps you have been given access to will appear on your dashboard.
The Learn app is where the learning sites are located that your teacher will have prepared for you. There will be a variety of information and activities for you to use.
The Messages app allows you to communicate with other users within your school. It is a simple messaging system similar to emails.
The Files app is where you can upload files to submit as homework. You can also store files to use at school or home rather than using a USB stick.
Your Profile


Your profile represents you on your school learning platform. It is a safe way of telling other users in your school learning platform about you. To access your profile click on your name in the top right corner of the screen and select Profile.
You can enter the following information into your profile. You profile can only be seen by those who are members of your school community and have a user account for this system. Once you have entered your information click on the blue Update button.

If your school uses School Merits you will be able to choose the avatar that you have created by clicking on the blue Set avatar button.

To choose a picture to represent you online click on the blue Select image button. Upload or choose a file from your Files area. Please see instructions on how to upload a file from your computer on page X.

|
|
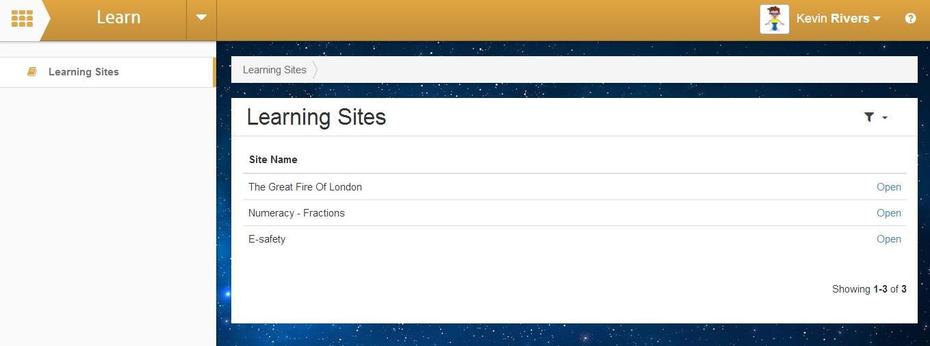
Learning Sites |
Your teachers will creating Learning Sites for you to use in school and at home. Your teachers will add information and activities for you. When you click on the Learn app you will see the Learning Sites that you have access to. To open a Learning Site click on the blue Open button on the right hand side of the row.
A Learning Site can be made up of many pages and subpages.

Your teacher will put information and lots of different activities here for you to work through. Activities can include, web links, documents, quizzes, videos, homework and games.
Please note that any bad language used in a wiki will not be posted and the administrator will be notified so that it can be dealt with.
Doing Coursework
Your teacher can set coursework and homework activities for you to do and you are expected to submit your work electronically.

Your student will complete the task as described and then upload a file to submit to the teacher.
Submitting a File
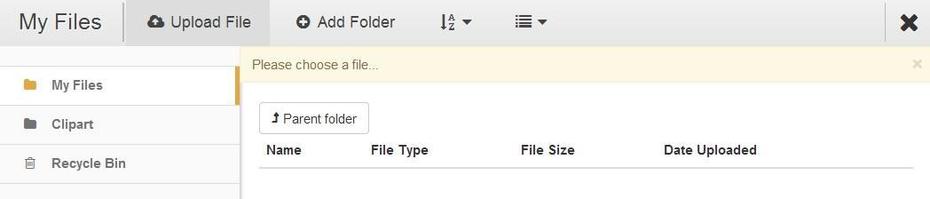
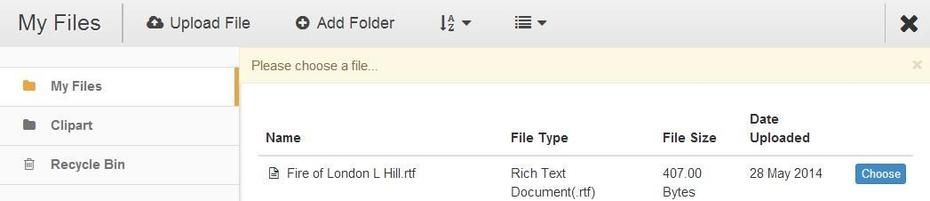
1. Click on the three dots button to the right of the Attach File field. This will open your Files area. Navigate to the folder you wish to upload the coursework/homework into and click on the Upload File button at the top of the window.
2. Click on the blue Add File button.
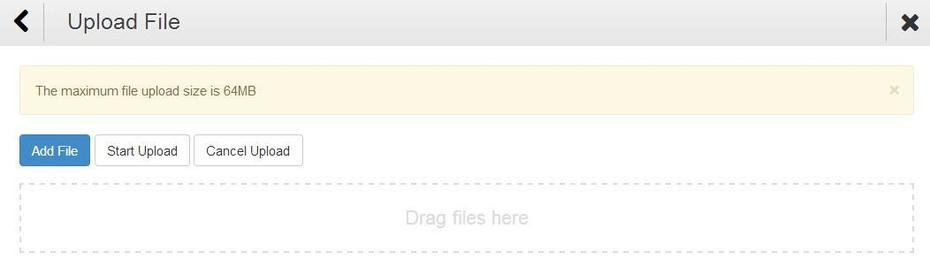
3. Windows Explorer will open, navigate to the folder that contains your file and click on it to highlight it. Click on the Open button at the bottom of the window.

4. Your file name will now appear in the Upload File window. Click on the Start Upload button. Once the file is uploaded click on the back button, in the top left of the window, to return to your folder.

5. Click on the blue Choose button for your file.
6. The file name will now appear in the Attach File field. Click on the green Send button.
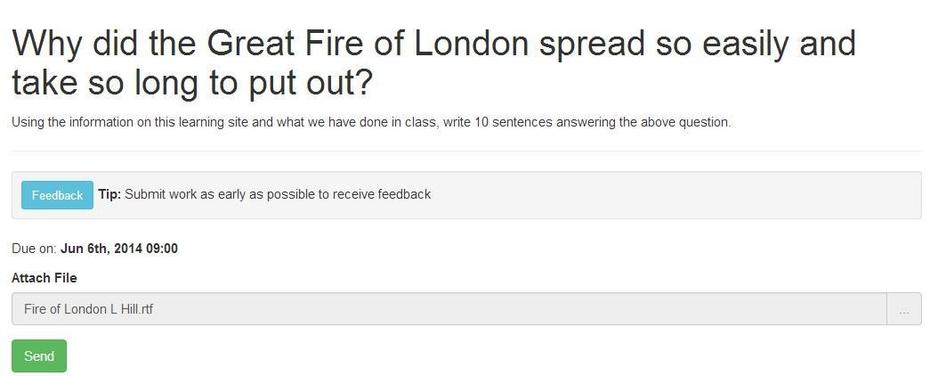
7. You will see the filename and a message to confirm that it has been uploaded successfully.
Using Documents
Your teacher can put documents straight onto the learning site. The document appears inside a document reader. The text can be made larger or smaller, there is a find facility and can be made full screen.

Downloading a File Attachment
You will be able to download files from the learning site.
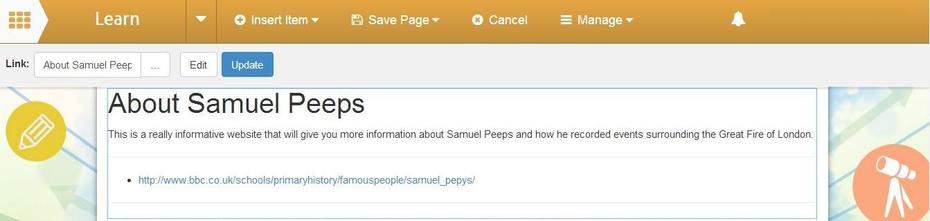
Using Links
Your teacher can add link to websites that you may have used in class or will provide additional information on the learning site. Your teacher will add a title and description explaining what the link is about.

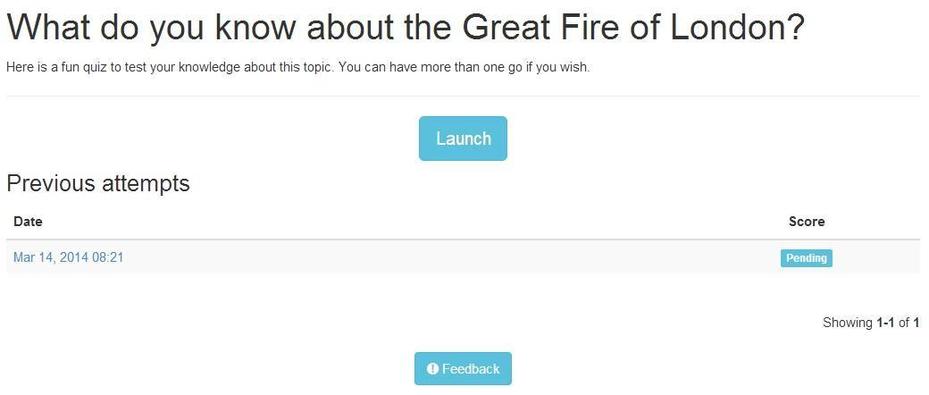
Working Through a Quiz
The quiz will look like this on the learning site.
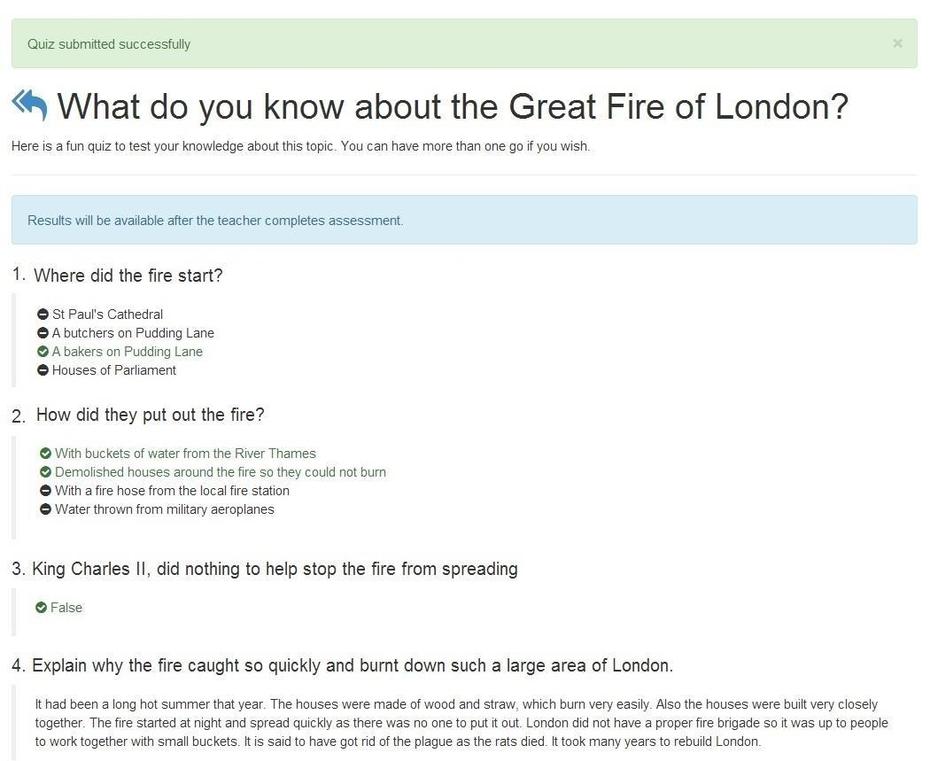
You will work through the quiz, answering the questions and clicking on the Next button to move through the quiz. When you have answered all of the questions you will click on the green Submit test button and then submit your answers to your teacher.

You will be presented with the following screen, showing which of the self marking questions you have got right or wrong. The text question need to be awarded a mark by your teacher. A final mark is not given at this stage, it will be reviewed by your teacher and feedback may be provided by your teacher.
Your teacher will complete the marking of the quiz and enter feedback. You can read the feedback and also add your own feedback to your teacher.
1. When you return to the learning site you will see an (!) in the Feedback box. You can click on that to view the feedback.
2. You can respond to the feedback, by clicking on the Add a new feedback button.
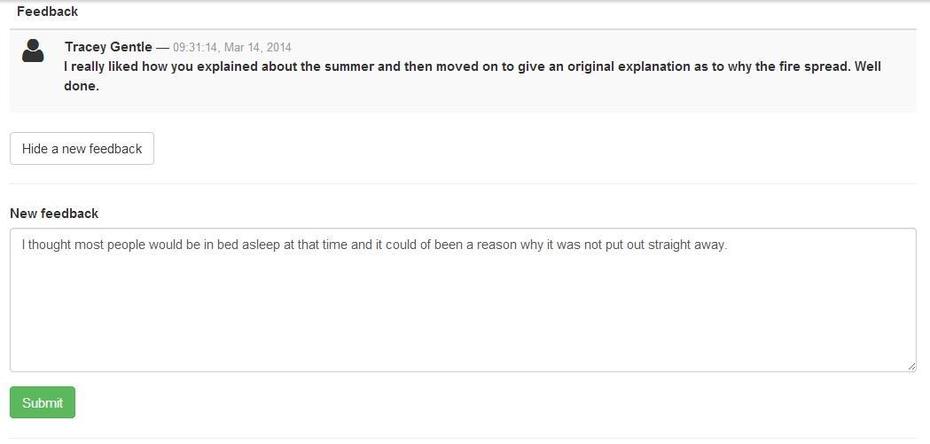
3. This has the capability to turn into a learning conversation.

Working on a Wiki
Wikis are a great way to record information collaboratively. They can be on any subject and a full record is kept of who did what on the wiki. At any point the wiki can be reset to any point, so if it all goes horribly wrong there is a back-up.

Your students will click on the blue Launch Wiki button to start working on the wiki.
Working on a Wiki
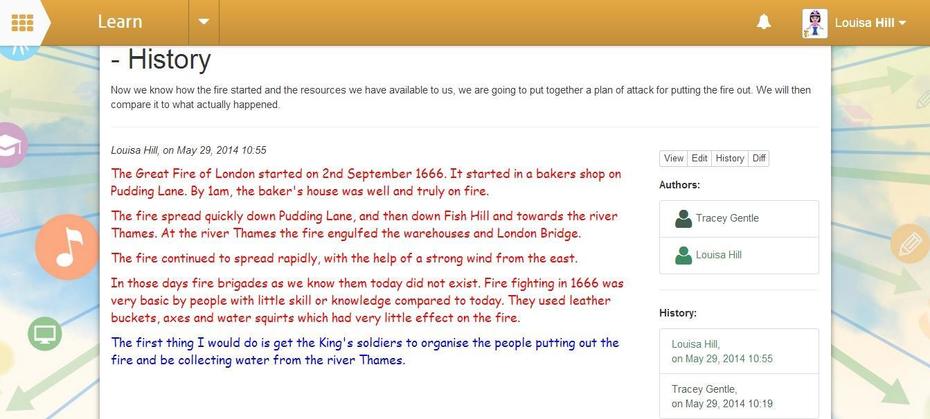
1. When you start to work on the wiki you will see this screen:
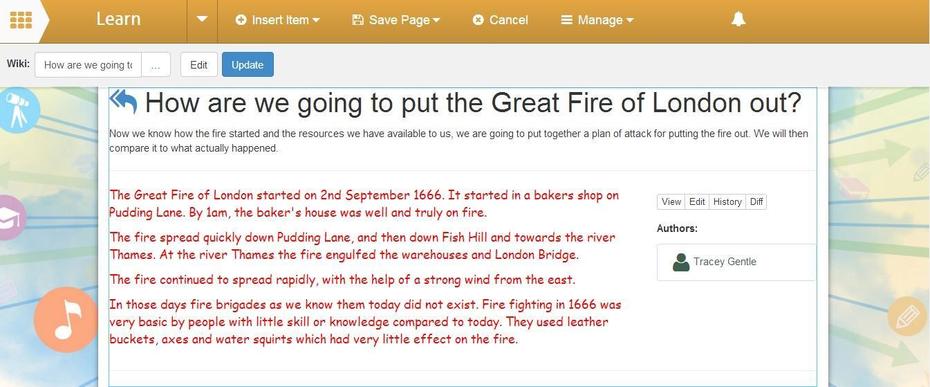
On the right hand side of the screen are four buttons, View, Edit, History and Diff.
View is the screen you start on and shown above.
Edit allows you to work on the wiki, adding and editing text.

History shows each person that has worked on the page. By clicking on the name and date of the work you will be taken back to that version of the wiki. This means if information is lost or edited incorrectly you can revert back to an earlier version of the wiki and continue working.
Diff shows the editing changes that have been made. It is displayed in HTML.

Images as a Hyperlink
An image can contain information about it and also be a hyperlink so that when the mouse cursor is placed over the image the will appear to indicated it is a hyperlink.

Using Audio and Videos
Your teacher can add audio recordings and videos made in class, this is a good way of keeping a record of the work that you do.

|
|
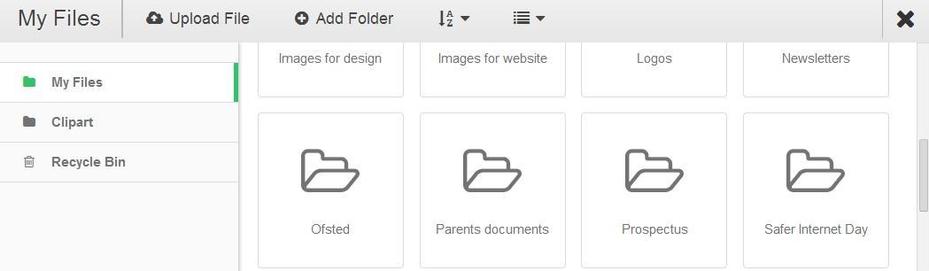
Files |
In the Files area you can upload and store files for your own use. Files looks like this for all users:

Uploading Files
1. First make a folder to upload the images into. Navigate to where you want to create the folder and click the Add Folder button.
2. Type the name of the folder and then click the Add Folder button.

3. Click into the folder that you have just created.
4. Click on the Upload File button that will open the Upload screen.
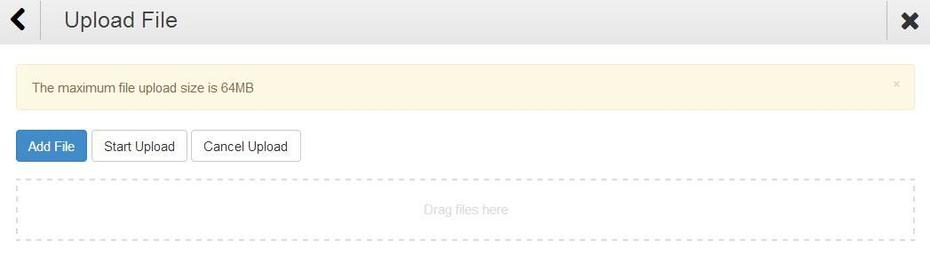
5. To upload a file or files click on the blue Add File button. This will open Windows Explorer on your computer, locate the images that you want to upload. You can select as many images as you like, either hold the Ctrl key down while you click on each image in turn or hold the left mouse button down and drag your mouse over the images to automatically select your images. Click on the Open button.

6. This will bring you back to the Upload screen where you will see the images that have been selected. Click on the Start Upload button.

7. On upload completion click on the < button (arrow head pointing to the left) at the top left of the open window.
This will take you back to the folder with the images that are now in.

Copying Files
1. To copy a file, select the file by adding a tick in the box on the left of the file row or add a tick to the Select All box if applicable. Then choose Copy from the Actions menu.
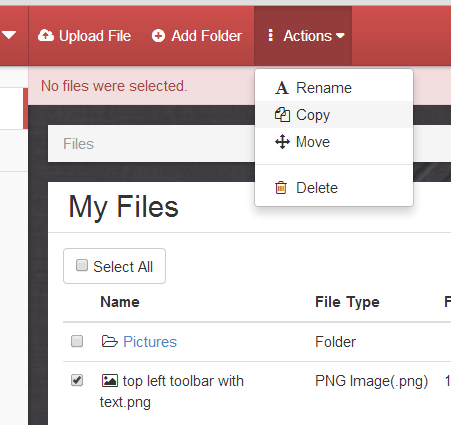
2. Type the copied file’s name into the box on the right, and press the Copy button. If you want to cancel the file copy, click the Cancel button.
The file will now appear in the file list.

Moving Files
To move a file to a different folder in your Files area, select the file using the tick box and choose Move from the Actions menu. If you wish to move all files click the Select All option.
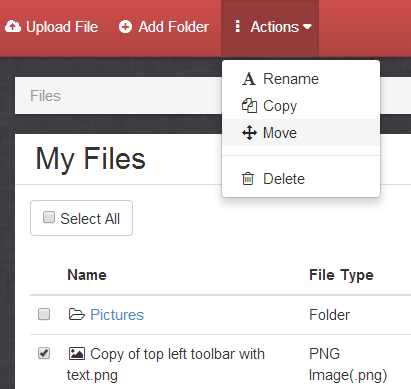
On the next screen choose which folder to move the file to using the dropdown box on the right. This example shows a folder called Pictures. If all of the files are going to be moved to the same folder click on the blue text more option and select the folder.

When you have chosen your folder, click the Move button. The file will be moved into the folder you have chosen.

|
|
Messages |
In the Messages area you can send and receive messages to other people who use your school’s Learn VLE.
1. The Action button allows you to mark messages as unread or delete them here. place a tick in the box on the left of the message row, click on the Actions button and then select the action you want to apply.
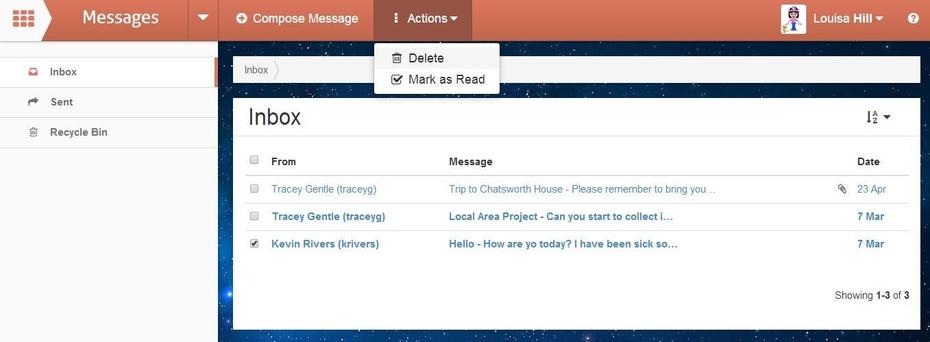
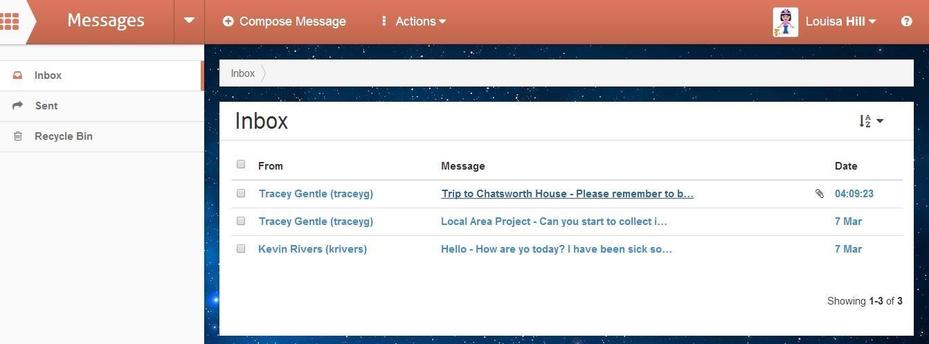
2. To open a message, click on the subject of the message.
3. The message will be displayed in full along with any attachments.
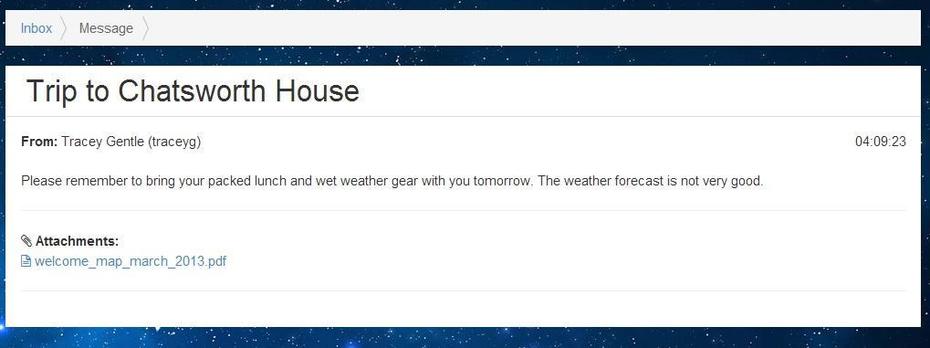
4. To download an attachment just click on the file name and it will automatically download.

Working with Messages
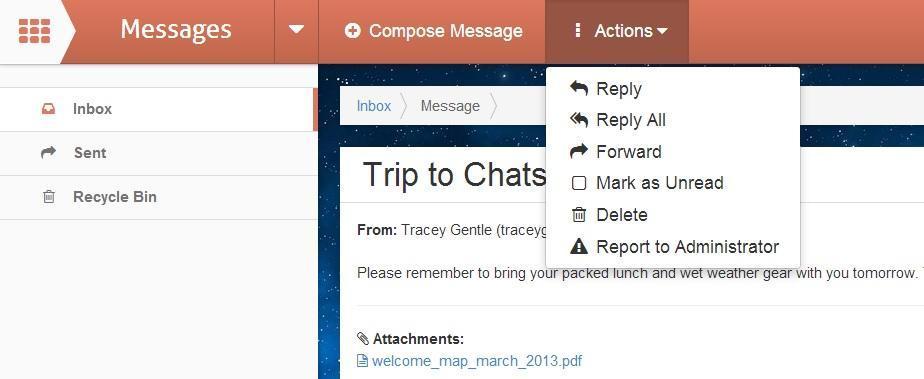
The Actions button allows you to work efficiently with messages. You can reply to just the sender as well as the sender and other recipients. The message can be forwarded onto others too. Messages have one of two status’, read and unread. Unread message will be displayed in bold in your inbox indicating that it needs your attention.
Messages can be deleted once they have been addressed and do not need to be referred to again. If a message is offensive you can report it to your administrator. The message will no longer appear in your inbox. Messages that contain any words from the bad word list will not be received but highlighted to the administrator. Messages can be offensive or upsetting without using bad language.
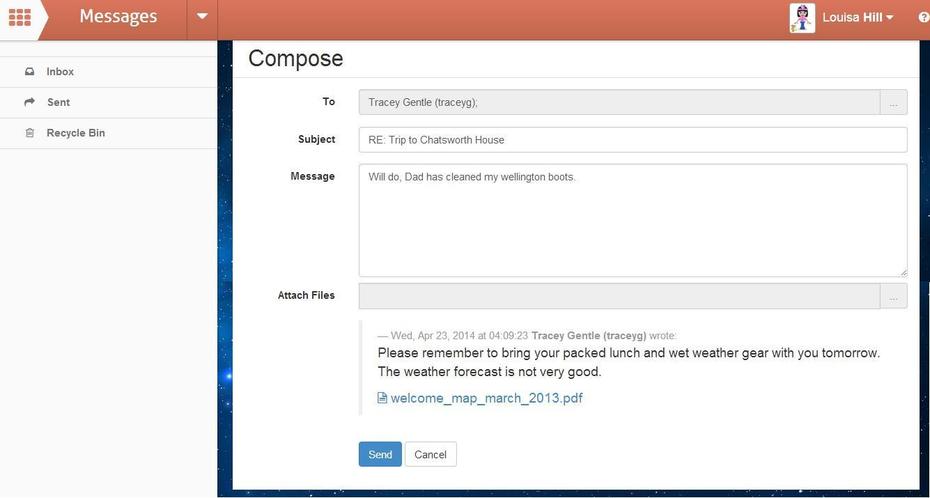
Replying to a Message
1. Click on the Actions button and then click on Reply or Reply All. You will be presented with the following screen and can enter your reply in the Message field. Click on the blue Send button to send your reply. You will be able to see this message in your Sent box. It will have a time and date stamp of when it was sent.
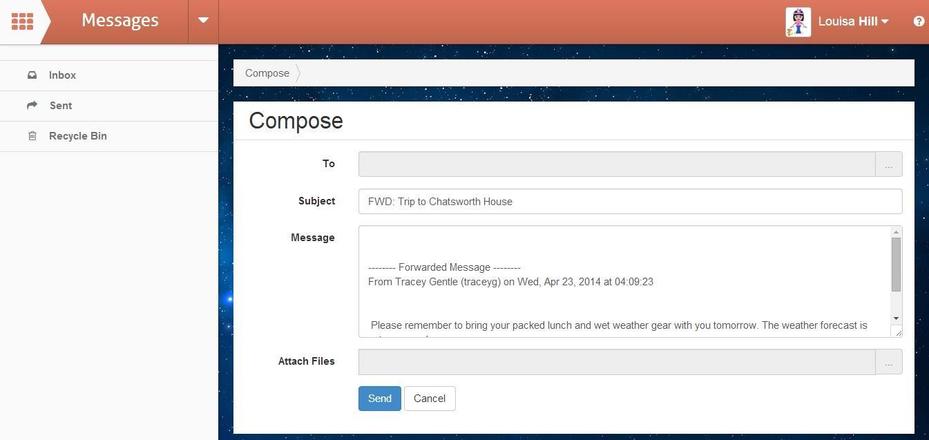
Forwarding A Message
Forwarding a message works in exactly the same way as sending a new message.
1. With your message open on the brown toolbar towards the top of the screen click on the Actions button.

2. The forward message screen will open.
3. You can search for the person that you want to send your message to. You can also select a group or user role. Once you have searched, simply click on the blue Filter button. The small square on the left of the contact row needs to be ticked so the user(s) are selected and then click on the blue Add button at the bottom of the window..

4. The user(s) that you have selected will appear at the bottom of the window and you will need to confirm that these are the people you want the message to be sent to. To do this click on the blue Choose button.

5. You will be returned to the compose screen and will see the people who will received this message. Enter the rest of the message information. The subject will be displayed in the recipients inbox. You can also attach files to your message.

6. Once you are happy with your message click on the blue Send button. You will get a message saying that your message has been sent successfully.